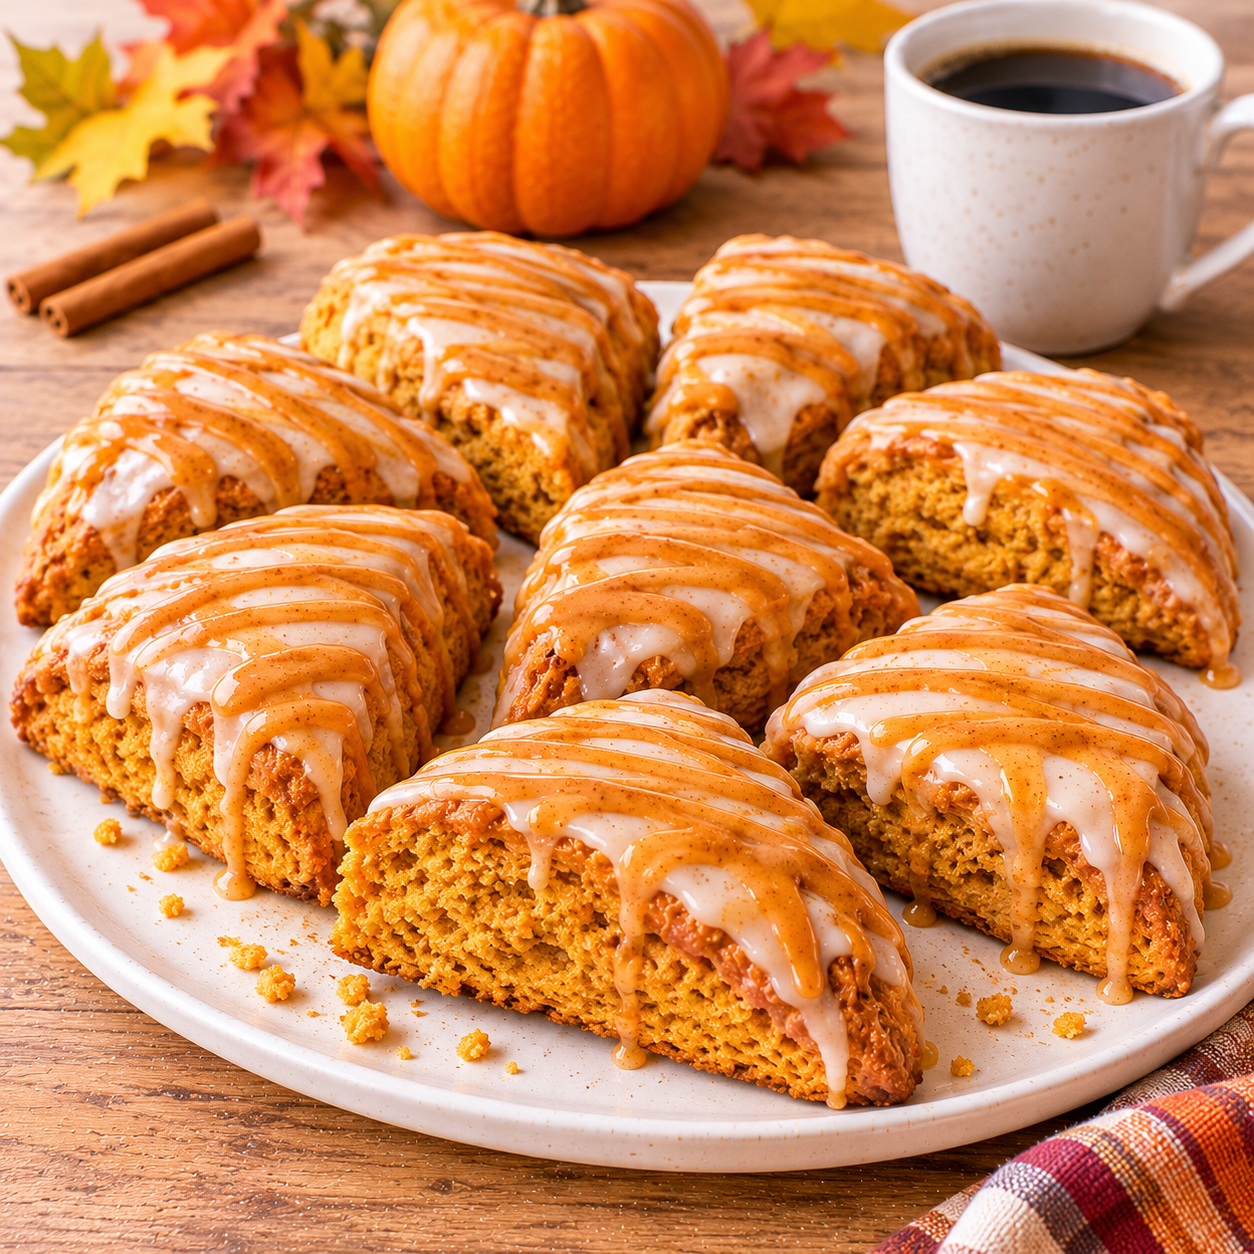
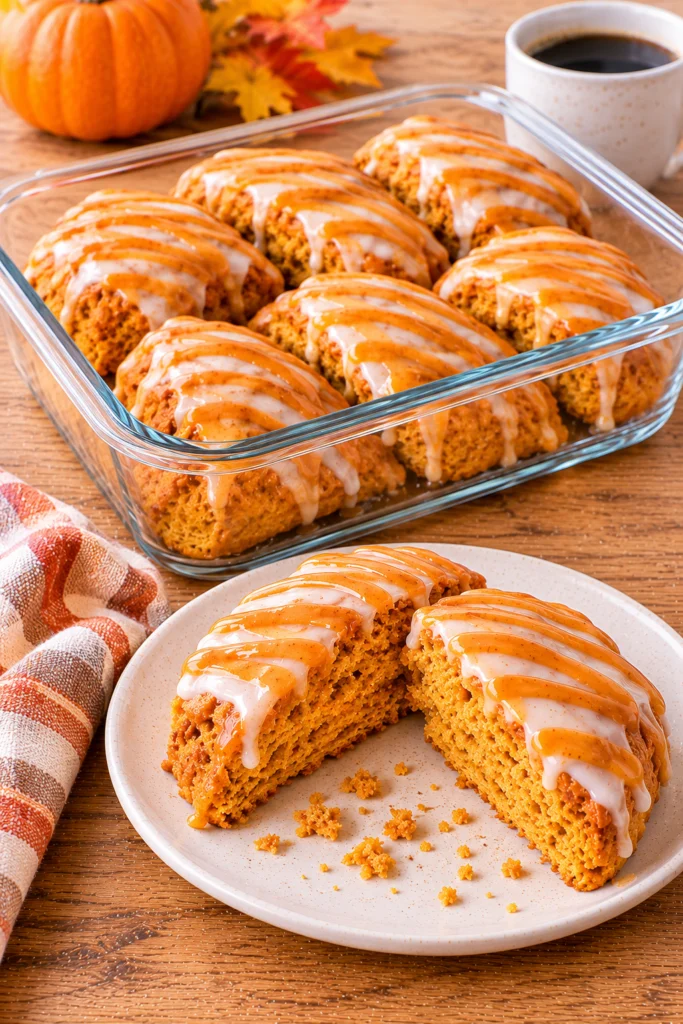
These homemade Pumpkin Scones are soft, tender, and filled with real pumpkin and warm fall spices. Each scone has a lightly crisp exterior, a buttery crumb, and a sweet double glaze made with vanilla and pumpkin spice. Ready in about 38 minutes, they are perfect for autumn breakfasts, holiday brunches, afternoon coffee, or a cozy homemade treat.
Quick facts
| Detail | Information |
|---|---|
| Prep Time | 20 minutes |
| Cook Time | 18 minutes |
| Total Time | 38 minutes |
| Servings | 8 scones |
| Course | Breakfast, Dessert, Snack |
| Cuisine | American |
| Difficulty | Easy |
| Main Ingredient | Pumpkin Puree |
| Baking Temperature | 400°F (200°C) |
Why You’ll Love This Recipe
- Soft and flaky texture: Cold butter creates a tender, crumbly center with lightly crisp edges.
- Real pumpkin flavor: Pumpkin puree adds moisture, color, and a delicious seasonal taste.
- Double-glazed finish: A white vanilla glaze and pumpkin-spice drizzle make these scones look bakery-style.
- Simple ingredients: You only need everyday baking staples and a few seasonal spices.
- Easy to prepare: The dough comes together quickly without complicated equipment.
- Perfect for sharing: These eight wedges are ideal for breakfast gatherings, brunches, and fall celebrations.
Ingredients
You need all-purpose flour, pumpkin puree, cold butter, brown sugar, cream, egg, and warm spices to make these homemade pumpkin scones. The two glazes add sweetness and give the finished pastries their signature appearance.
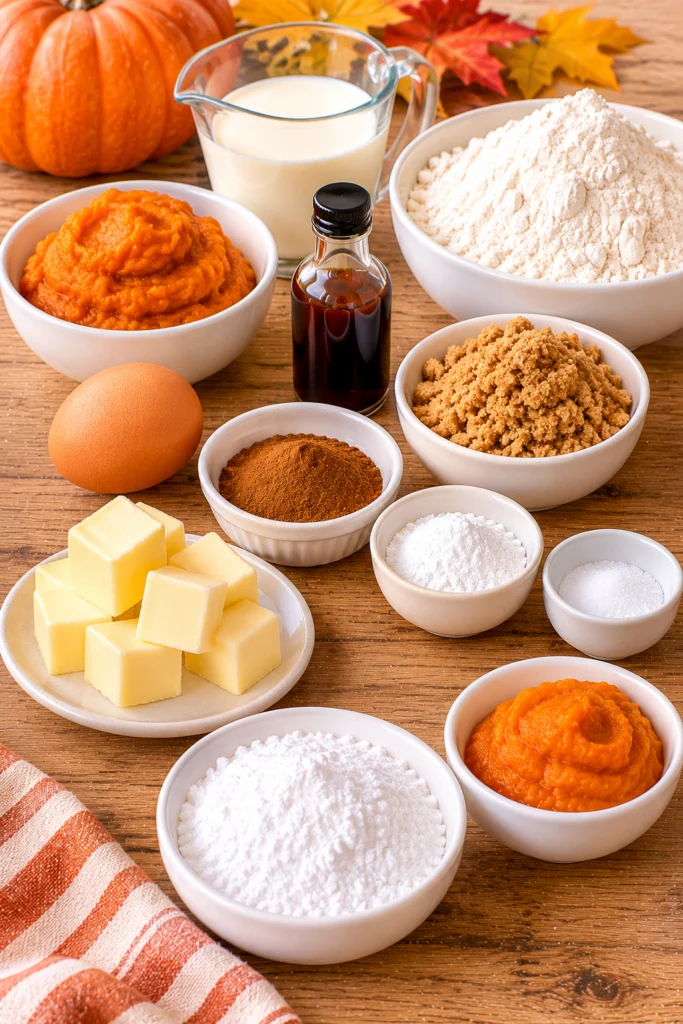
For the Scones
- 1/2 cup pumpkin puree (not pumpkin pie filling)
- 3 tablespoons heavy cream
- 1 large egg
- 1 teaspoon vanilla extract
- 2 cups all-purpose flour
- 1/3 cup brown sugar
- 2 teaspoons pumpkin pie spice
- 1 1/2 teaspoons baking powder
- 1/2 teaspoon salt
- 1/2 cup unsalted butter, cold and cubed
For the White Glaze
- 1 cup powdered sugar
- 1–2 tablespoons heavy cream
- 1/2 teaspoon vanilla extract
For the Pumpkin Spice Glaze
- 3/4 cup powdered sugar
- 1 tablespoon pumpkin puree
- 1/4 teaspoon pumpkin pie spice
- 1–2 teaspoons heavy cream, as needed
Ingredient Notes and Substitutions
Pumpkin puree: Use plain, unsweetened 100% pumpkin puree. Pumpkin pie filling contains added sugar and spices, which can change the flavor and texture.
Cold butter: Keep the butter refrigerated until you are ready to use it. Small pieces create pockets of fat that help produce a flaky scone.
Heavy cream: Heavy cream adds richness and moisture. Half-and-half can work as a substitute, although the texture may be slightly different.
All-purpose flour: Measure carefully and avoid packing flour into the measuring cup, as too much flour can make the scones dry.
Brown sugar: Adds sweetness and a subtle caramel-like flavor that complements pumpkin.
Pumpkin pie spice: Provides the warm seasonal flavor. If you do not have a prepared blend, use a mixture of cinnamon, ginger, nutmeg, and cloves.
Egg: Helps bind the dough and contributes to its structure.
Powdered sugar: Creates a smooth glaze. Add cream gradually until each glaze reaches a thick but drizzleable consistency.
How to Make Pumpkin Scones
These pumpkin scones are easy to prepare with a mixing bowl, pastry cutter, and baking sheet. The key is to keep the butter cold and avoid overworking the dough.
Step 1: Prepare the Oven and Baking Sheet
Preheat your oven to 400°F (200°C). Line a baking sheet with parchment paper or a silicone baking mat. This helps prevent sticking and encourages even browning.
Step 2: Mix the Wet Ingredients
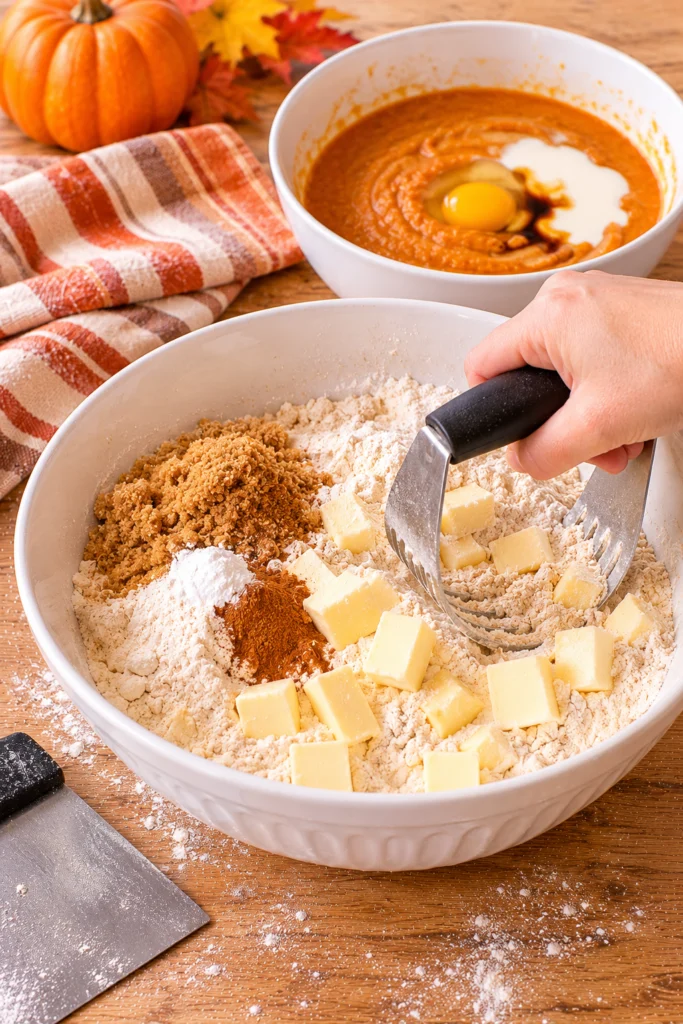
In a small mixing bowl, whisk together the pumpkin puree, heavy cream, egg, and vanilla extract until the mixture is smooth and evenly combined. Set aside.
Step 3: Combine the Dry Ingredients and Butter
In a large mixing bowl, whisk together the flour, brown sugar, pumpkin pie spice, baking powder, and salt.
Add the cold, cubed butter. Use a pastry cutter to work the butter into the flour mixture until it resembles coarse crumbs with some pea-sized butter pieces remaining.
Step 4: Bring the Dough Together
Pour the pumpkin mixture into the dry ingredients. Stir gently until the dough starts to come together. It should look slightly crumbly but hold together when pressed.
Transfer the dough to a lightly floured surface. Gently knead it just a few times until it forms a cohesive dough. Avoid adding too much extra flour or overworking it.
Step 5: Shape and Cut the Scones
Shape the dough into a round disc approximately 1 inch thick. Use a sharp knife or bench scraper to cut the circle into eight equal wedges.
Arrange the wedges on your prepared baking sheet, leaving space between each one. If your kitchen is warm or the butter has softened, refrigerate the cut scones for about 10 minutes before baking.
Step 6: Bake Until Golden
Bake for 14–18 minutes, or until the scones are lightly golden around the edges and cooked through. Baking time may vary depending on the size and thickness of your wedges.
Transfer the baked scones to a wire rack and allow them to cool completely before glazing.
Step 7: Add the Two Glazes
For the white glaze, whisk the powdered sugar, vanilla extract, and 1 tablespoon of heavy cream. Add more cream a little at a time until thick but spreadable. Spoon or drizzle it over the cooled scones.
Allow the first glaze layer to set. Then whisk together the powdered sugar, pumpkin puree, pumpkin pie spice, and enough cream to create a drizzleable consistency.
Drizzle the pumpkin glaze over the white layer. Let both layers set before serving.
Pro Tips for the Best Pumpkin Scones
- Keep the butter cold: Cold butter is essential for a flaky texture. If it starts softening while you work, chill the dough briefly.
- Do not overmix: Mix only until the dough comes together. Excessive handling can make the scones dense and tough.
- Use thick pumpkin puree: If your puree seems watery, blot or strain excess moisture before measuring.
- Cut clean wedges: A sharp knife or bench scraper creates cleaner edges and helps the scones bake evenly.
- Chill before baking: A short 10-minute chill can help the scones hold their shape and rise better.
- Cool before glazing: Warm scones will cause the glaze to melt and slide off.
- Add glaze gradually: Adjust the cream slowly so both glazes remain thick enough to sit on top of the scones.
Common Mistakes to Avoid
Using pumpkin pie filling: It contains added sweeteners and spices. Choose plain pumpkin puree instead.
Using softened butter: Soft butter can make the dough greasy and reduce the flaky texture.
Adding too much flour: Excess flour makes scones dry and heavy. Measure carefully.
Overworking the dough: Too much kneading develops gluten and can result in tough scones.
Skipping the cooling step: Glazing before the scones cool completely can create a thin, runny coating.
Applying the second glaze too soon: Let the white glaze set first so the two layers remain distinct.
Variations
- Pecan Pumpkin Scones: Fold 1/4 cup finely chopped toasted pecans into the dough for extra crunch.
- Chocolate Chip Pumpkin Scones: Add 1/3 cup mini chocolate chips for a sweeter bakery-style variation.
- Maple Glaze: Replace the vanilla extract in the white glaze with a little pure maple syrup, adjusting the cream as needed.
- Cinnamon Pumpkin Scones: Add an extra 1/2 teaspoon ground cinnamon to the dry ingredients for a stronger cinnamon flavor.
- Dairy-Free Option: Use a suitable plant-based butter and unsweetened dairy-free cream alternative. The texture may vary.
Serving Suggestions
Serve pumpkin scones slightly warm or at room temperature with your favorite breakfast or afternoon drink.
- Coffee: Pair with hot coffee, a latte, or a cappuccino.
- Tea: Enjoy with chai tea or cinnamon-spiced black tea.
- Breakfast Spread: Serve alongside scrambled eggs, fresh fruit, and yogurt.
- Brunch Table: Add them to a fall brunch spread with muffins, breakfast casseroles, and fresh berries.
- Extra Toppings: A little softened butter or a light drizzle of maple syrup makes a delicious addition.
For more breakfast inspiration, try our Pumpkin French Toast or Easy Breakfast Shakshuka Recipe.
Storage and Reheating
Store completely cooled and glazed pumpkin scones in an airtight container at room temperature for up to 3 days. Keep them in a cool, dry place and avoid stacking them until the glaze has fully set.
For longer storage, freeze the baked scones for up to 1 month. Arrange them in a freezer-safe container with parchment paper between layers to protect the glaze. Thaw at room temperature before serving.
To warm a scone, place it in a low-temperature oven or toaster oven for a few minutes. Avoid overheating, as this can dry out the crumb and soften the glaze.
| Storage Method | How Long | Instructions |
|---|---|---|
| Room Temperature | Up to 3 days | Store in an airtight container after the glaze sets. |
| Refrigerator | Not necessary | Room-temperature storage is preferable for short-term freshness. |
| Freezer | Up to 1 month | Freeze in a sealed freezer-safe container with parchment between layers. |
| Reheating | A few minutes | Warm gently in a low-temperature oven or toaster oven. |
Reheating Tip: The oven or air fryer gives the best texture. Avoid overheating, as this can dry out the center.
Nutritional Information
The following values are estimates for one pumpkin scone, including both glaze layers. Actual nutrition may vary depending on ingredient brands, glaze quantity, and portion size.
| Nutrient | Estimated Amount |
|---|---|
| Calories | 360 kcal |
| Protein | 5 g |
| Carbohydrates | 53 g |
| Fat | 15 g |
| Saturated Fat | 9 g |
| Fiber | 1 g |
| Sugar | 27 g |
| Sodium | 260 mg |
Frequently Asked Questions
Can I use homemade pumpkin puree?
Yes. Homemade pumpkin puree works well as long as it is thick and not watery. Strain or blot excess moisture before measuring so it does not make the dough too wet.
Why did my pumpkin scones turn out dense?
Overmixing the dough, using softened butter, or adding too much flour can make scones dense. Mix gently and keep the butter cold for a tender, flaky result.
Can I freeze pumpkin scone dough?
Yes. Cut the dough into eight wedges, arrange them on a baking sheet, and freeze until firm. Transfer the frozen wedges to a freezer-safe bag or container. Bake from frozen, checking for doneness and adding a little extra baking time if needed.
Do I need to use both glazes?
No. Both glazes are optional, but they create the signature bakery-style finish. You can use only the white glaze, only the pumpkin glaze, or serve the scones plain.
How do I know when pumpkin scones are done?
The edges should look lightly golden, and the centers should be set rather than wet. Start checking around 14 minutes because oven temperatures and scone thickness can vary.
Can I make pumpkin scones ahead of time?
Yes. You can prepare and cut the dough ahead, then refrigerate the wedges briefly before baking. You can also bake the scones in advance and glaze them after they have cooled.
What is the best way to keep pumpkin scones flaky?
Use cold butter, handle the dough as little as possible, and avoid adding excess flour. Chilling the shaped wedges before baking can also help them maintain their structure.
More Recipes You’ll Love
If you enjoy cozy breakfast recipes and seasonal homemade treats, try these recipes next:
- Pumpkin French Toast – A warmly spiced breakfast with pumpkin flavor.
- Easy Breakfast Shakshuka Recipe – A savory breakfast option with eggs and a flavorful tomato base.
Final Thoughts
These homemade Pumpkin Scones bring together real pumpkin, cold butter, and warm fall spices for a tender, bakery-style treat. The double glaze adds a sweet finish that makes them especially lovely for autumn breakfasts, holiday brunches, or an afternoon coffee break.
Keep the butter cold, handle the dough gently, and let the scones cool completely before glazing. With simple ingredients and an easy baking method, this is a pumpkin recipe worth making throughout the fall season.
Pumpkin Scones
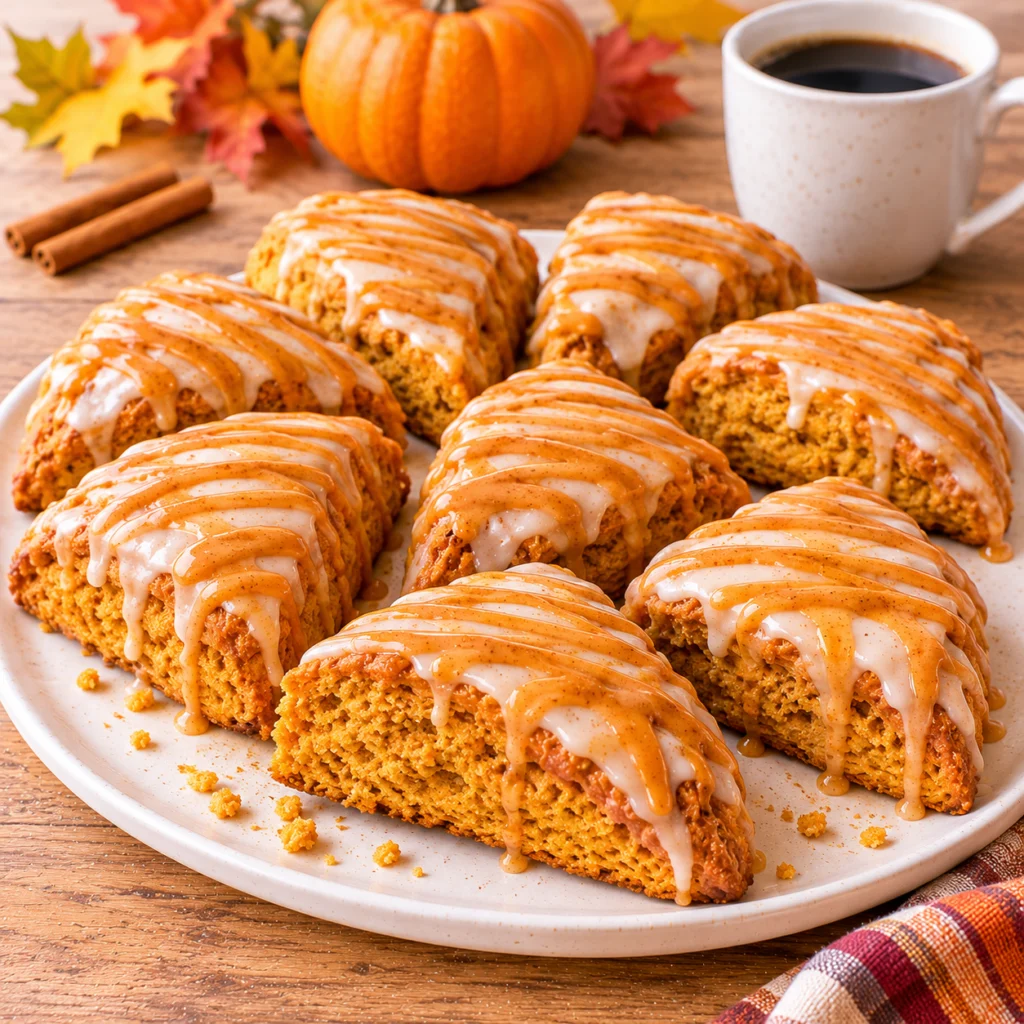
These homemade Pumpkin Scones are soft, tender, and filled with real pumpkin and warm fall spices. Each scone has a lightly crisp exterior, a buttery crumb, and a sweet double glaze made with vanilla and pumpkin spice. Ready in about 38 minutes, they are perfect for autumn breakfasts, holiday brunches, afternoon coffee, or a cozy homemade treat.
- 1/2 cup pumpkin puree (not pumpkin pie filling)
- 3 tablespoons heavy cream
- 1 large egg
- 1 teaspoon vanilla extract
- 2 cups all-purpose flour
- 1/3 cup brown sugar
- 2 teaspoons pumpkin pie spice
- 1 1/2 teaspoons baking powder
- 1/2 teaspoon salt
- 1/2 cup unsalted butter, cold and cubed
- 1 cup powdered sugar
- 1–2 tablespoons heavy cream
- 1/2 teaspoon vanilla extract
- 3/4 cup powdered sugar
- 1 tablespoon pumpkin puree
- 1/4 teaspoon pumpkin pie spice
- 1–2 teaspoons heavy cream, as needed
- Prepare the Oven and Baking Sheet
- Mix the Wet Ingredients
- Combine the Dry Ingredients and Butter
- Bring the Dough Together
- Shape and Cut the Scones
- Bake Until Golden
- Add the Two Glazes
- Keep the butter cold: Cold butter is essential for a flaky texture. If it starts softening while you work, chill the dough briefly.
- Do not overmix: Mix only until the dough comes together. Excessive handling can make the scones dense and tough.
- Use thick pumpkin puree: If your puree seems watery, blot or strain excess moisture before measuring.
- Cut clean wedges: A sharp knife or bench scraper creates cleaner edges and helps the scones bake evenly.
- Chill before baking: A short 10-minute chill can help the scones hold their shape and rise better.
- Cool before glazing: Warm scones will cause the glaze to melt and slide off.
- Add glaze gradually: Adjust the cream slowly so both glazes remain thick enough to sit on top of the scones.

Bella is a home cook who turns simple, everyday ingredients into meals worth gathering around. On Finds Your Recipe she shares quick weeknight dinners, cozy comfort food, and easy desserts made for real, busy life — no fancy skills needed, just good food on the table.
Learn more about Bella