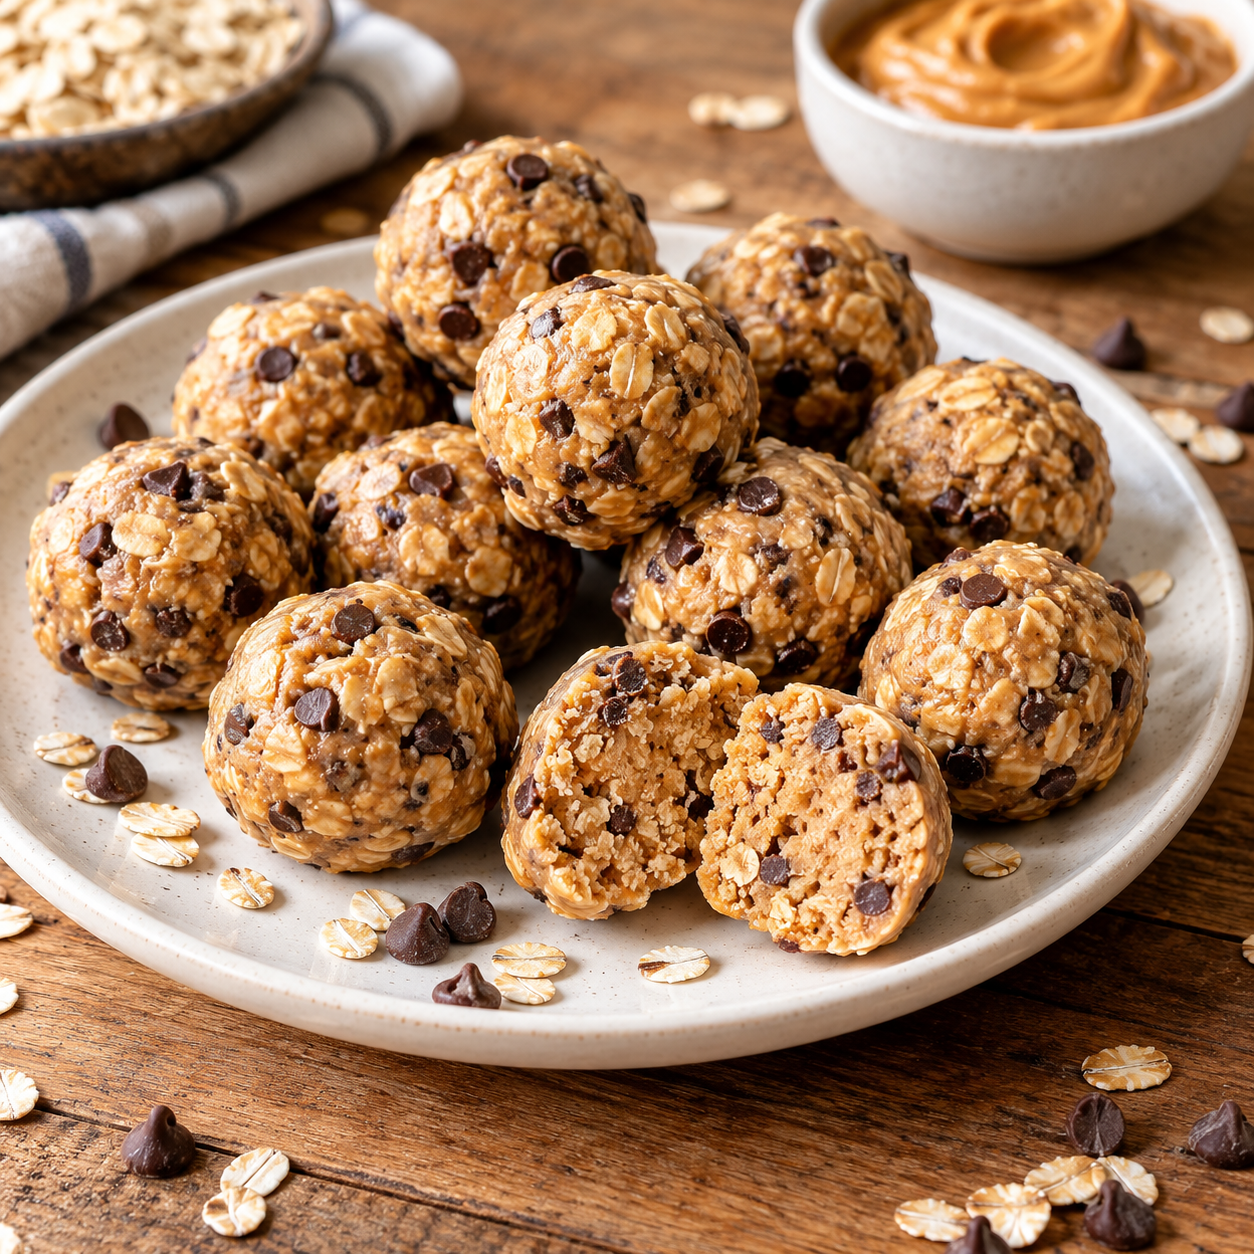
These Easy No Bake Protein Balls are made with creamy peanut butter, honey, rolled oats, vanilla protein powder, and mini chocolate chips for a convenient, satisfying snack. No oven is needed, and the hands-on preparation takes just 15 minutes. After chilling, you’ll have 24 bite-sized protein balls that are easy to grab for breakfast on the go, an afternoon snack, or a post-workout treat.
Quick facts
| Detail | Information |
|---|---|
| Prep Time | 15 minutes |
| Chilling Time | 1 hour |
| Active Cook Time | 0 minutes |
| Total Time | 1 hour 15 minutes |
| Yield | 24 protein balls |
| Difficulty | Easy |
| Cuisine | American-inspired |
| Course | Snack or dessert |
| Method | No-bake |
Why This Recipe Works
- No oven required: Mix, roll, and refrigerate. There is no baking involved.
- Simple pantry ingredients: Peanut butter, oats, honey, protein powder, and chocolate chips create a flavorful snack.
- Easy to prepare ahead: Make a batch and refrigerate it for convenient snacks throughout the week.
- Customizable flavor: Change the protein powder, nut butter, or add-ins to suit your preferences.
- Bite-sized portions: Small portions make these balls convenient to pack for work, school, or travel.
- A satisfying snack: Peanut butter and oats provide a combination of fats, carbohydrates, and some protein.
Ingredients
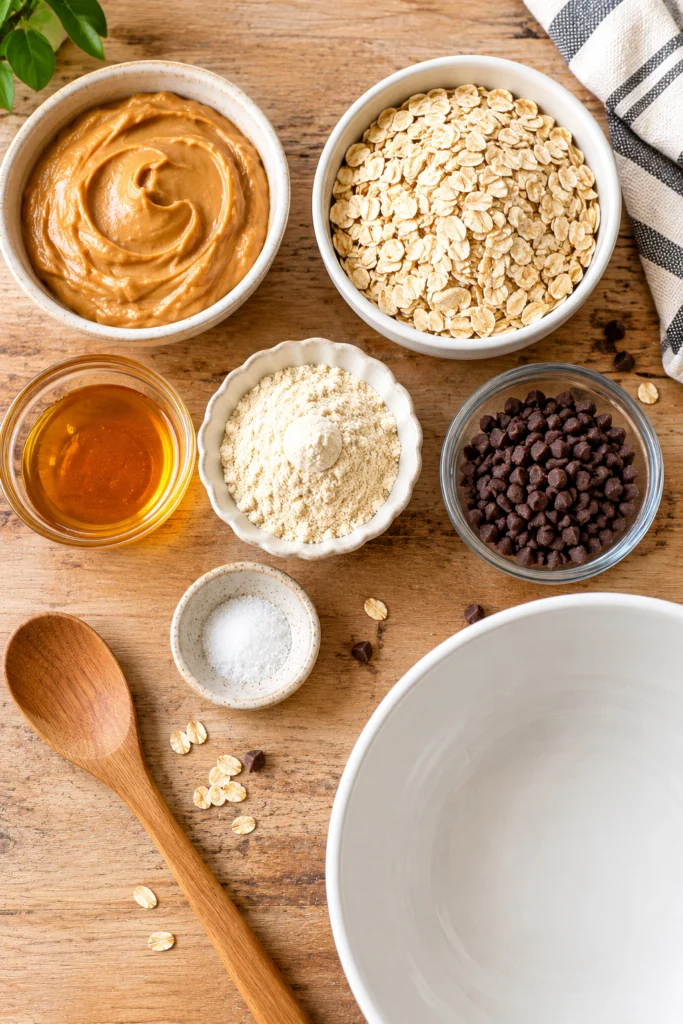
You only need six ingredients to make these homemade no-bake protein balls.
- 1½ cups no-stir creamy peanut butter
- ½ cup honey
- 1⅓ cups old-fashioned rolled oats
- ½ cup vanilla protein powder
- ⅛ teaspoon salt
- ½ cup mini chocolate chips
Ingredient Notes and Substitutions
Peanut butter: No-stir creamy peanut butter makes the mixture easy to combine and roll. If using natural peanut butter, stir it thoroughly before measuring. If it is unusually runny, you may need additional oats or a little extra protein powder.
Honey: Honey binds the mixture and adds sweetness. Maple syrup or agave syrup can work, although the consistency may differ. Add alternative liquid sweeteners gradually until the mixture holds together.
Rolled oats: Old-fashioned oats provide texture and structure. Quick oats can also work and may create a softer, less chewy texture. Use certified gluten-free oats if needed.
Vanilla protein powder: Whey and plant-based powders can both work, but they absorb liquid differently. Start with the listed quantity and adjust the texture before rolling.
Salt: A small amount balances the sweetness and brings out the peanut butter and chocolate flavors. If your peanut butter is already salted, you can reduce or omit the added salt.
Mini chocolate chips: Mini chips distribute more evenly throughout the mixture than larger chocolate pieces. Use dark chocolate chips for a less sweet flavor or dairy-free chips if needed.
Nut-free option: Replace the peanut butter with sunflower seed butter, checking that it has a thick consistency suitable for rolling.
Vegan option: Use maple syrup instead of honey and choose a suitable plant-based protein powder and dairy-free chocolate chips.
Gluten-free option: Use certified gluten-free oats and check that your protein powder and other packaged ingredients are gluten-free.
How to Make No Bake Protein Balls
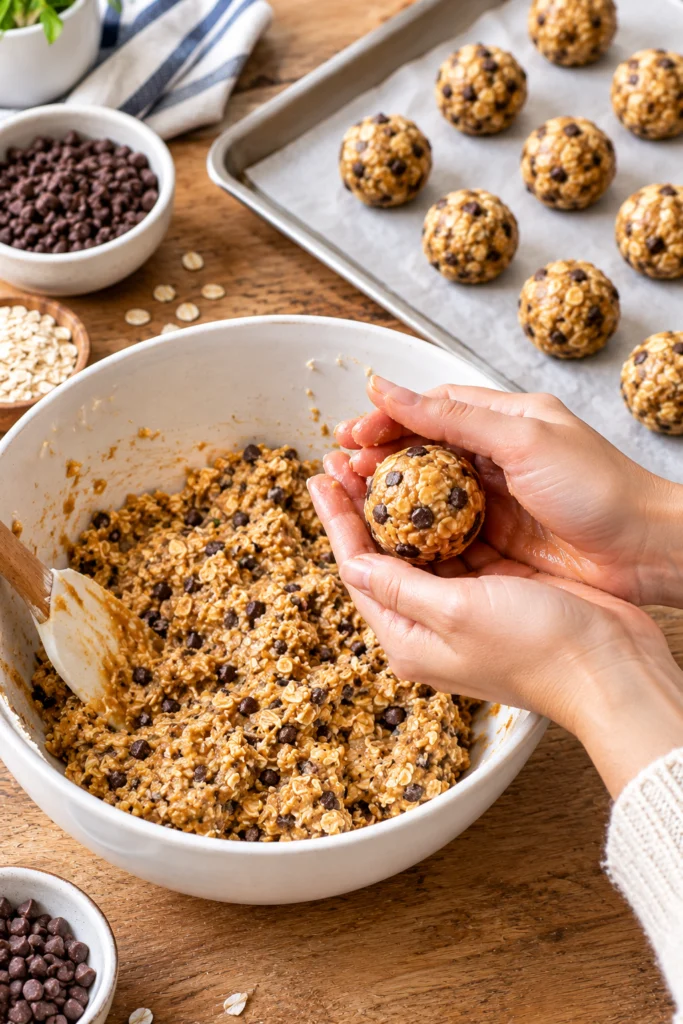
Step 1: Combine the Ingredients
Add the peanut butter, honey, rolled oats, vanilla protein powder, and salt to a large mixing bowl.
Stir with a sturdy spoon or rubber spatula until the ingredients begin to come together. Fold in the mini chocolate chips and continue mixing until they are evenly distributed.
The mixture should be thick and sticky enough to hold together when pressed between your fingers.
Step 2: Adjust the Mixture if Needed
If the mixture feels too wet or sticky to handle, add rolled oats or protein powder one tablespoon at a time.
If it seems too dry or crumbly, add a small amount of peanut butter or honey and mix again. Protein powders vary in absorbency, so make small adjustments rather than adding too much at once.
Step 3: Portion the Mixture
Line a baking sheet or large plate with parchment paper.
Use a mini cookie scoop or tablespoon to portion the mixture into 24 approximately equal pieces. Consistent portions help the protein balls look uniform and make serving sizes easier to estimate.
Step 4: Roll into Balls
Roll each portion between your palms until it forms a compact ball about 1 inch in diameter.
Place the finished balls on the parchment-lined sheet. If the mixture becomes too sticky while rolling, refrigerate it for 10–15 minutes before continuing.
Step 5: Chill Until Firm
Refrigerate the protein balls for at least 1 hour, or until they feel firm enough to handle without losing their shape.
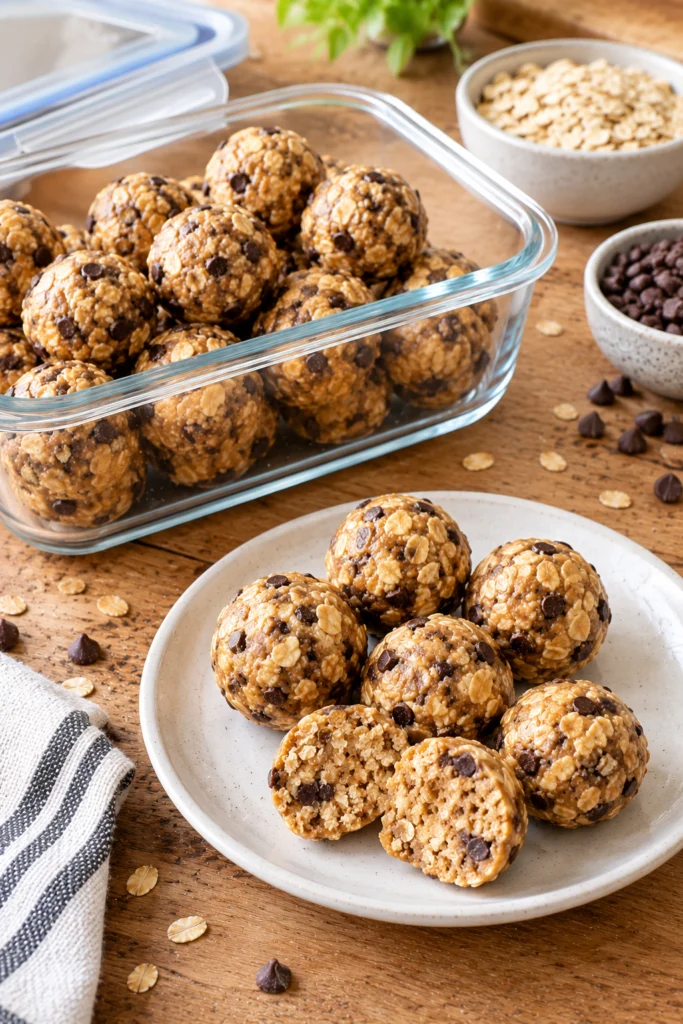
Once chilled, transfer them to an airtight container for storage.
Step 6: Serve and Enjoy
Enjoy the protein balls straight from the refrigerator as a quick snack or small dessert. They pair well with fresh fruit, plain yogurt, or a glass of milk or your preferred milk alternative.
Pro Tips for the Best Results
- Measure the protein powder carefully: Different brands absorb different amounts of moisture, so use the texture of the mixture as your guide.
- Use room-temperature peanut butter: It is easier to stir and combine with the oats and honey.
- Make even portions: A cookie scoop helps create consistent-sized balls.
- Chill before rolling if necessary: A short rest in the refrigerator makes sticky mixtures easier to handle.
- Do not add too much liquid: Excess honey or syrup can make the mixture difficult to roll and store.
- Let the balls firm up completely: The chilling step helps them hold their shape.
- Taste before rolling: If you prefer a sweeter snack, adjust the chocolate chips or sweetness slightly before portioning.
Common Mistakes to Avoid
Using runny peanut butter: Very thin peanut butter can make the mixture too soft. Stir natural peanut butter well and adjust the dry ingredients gradually if necessary.
Adding too much protein powder: Excess powder can make the balls dry and chalky. Add more only when the mixture is too sticky to shape.
Skipping the chilling step: Freshly rolled balls may be soft. Refrigeration helps them become firmer and easier to store.
Making the balls too large: Oversized portions change the yield and make the nutrition estimate per ball less accurate.
Using the wrong sweetener consistency: Thin syrups may not bind the oats as effectively as honey. Add liquid substitutes gradually and adjust the mixture as needed.
Easy Variations
- Chocolate Protein Balls: Replace the vanilla protein powder with chocolate protein powder. You can also add a teaspoon of unsweetened cocoa powder, adjusting the mixture if it becomes dry.
- Coconut Protein Balls: Add ¼ cup unsweetened shredded coconut for extra texture and coconut flavor.
- Nutty Protein Balls: Mix in a few tablespoons of finely chopped almonds, walnuts, or pecans.
- Fruit and Oat Protein Balls: Add a small amount of finely chopped dried cranberries, raisins, or dates. These add sweetness and change the carbohydrate content.
- Chia and Flax Protein Balls: Add one or two tablespoons of chia seeds or ground flaxseed. If the mixture becomes dry, add a little more peanut butter.
- Dark Chocolate Version: Use dark chocolate mini chips for a deeper chocolate flavor.
- Vegan Protein Balls: Use maple syrup, plant-based protein powder, and dairy-free chocolate chips. Adjust the mixture if the syrup changes the consistency.
Serving Suggestions
These no-bake protein balls are easy to enjoy in several ways:
- Afternoon snack: Keep a few refrigerated for a quick bite between meals.
- Pre-workout snack: Enjoy a small portion before exercise if it suits your routine.
- Post-workout snack: Pair with yogurt or milk for a more substantial snack.
- Breakfast on the go: Serve with a banana or another piece of fruit.
- Lunchbox treat: Pack in a small container, keeping them cool when necessary.
- Healthier-style dessert: Enjoy one or two when you want something sweet with peanut butter and chocolate flavors.
For another easy protein-focused breakfast, try Easy Healthy Protein Waffles. If you prefer a baked snack, these Easy High-Protein Blueberry Cottage Cheese Muffins are another convenient option.
Storage and Reheating
| Storage Method | Duration | Instructions |
|---|---|---|
| Refrigerator | Up to 1 week | Store in an airtight container to maintain freshness and texture. |
| Freezer | 2–3 months for best quality | Freeze in a sealed freezer-safe container, separating layers with parchment paper if needed. |
| Thawing | Until softened | Thaw frozen balls in the refrigerator or allow a short time at room temperature before serving. |
Storage tip: Because this recipe contains peanut butter and other ingredients that can vary by brand, keep the finished balls refrigerated in a clean, airtight container for best quality.
Freezing tip: Freeze the balls in a single layer until firm, then transfer them to a freezer-safe bag or container. This helps prevent them from sticking together.
Reheating: No reheating is needed. These protein balls are designed to be eaten chilled or slightly softened.
Nutritional Information
The following values are estimated per protein ball, based on the listed ingredients and a yield of 24 balls. Actual nutrition depends on the peanut butter, protein powder, honey, oats, and chocolate chips you use.
| Nutrient | Estimated Amount per Ball |
|---|---|
| Calories | 150–200 kcal |
| Protein | 5–8 g |
| Total Carbohydrates | 10–15 g |
| Total Fat | 8–12 g |
Nutrition note: These are approximate ranges, not verified laboratory values. The full batch contains 24 balls only if the mixture is divided into 24 equal portions. For the most accurate nutrition panel on your website, enter your exact ingredient brands and quantities into your recipe plugin and divide the batch totals by 24.
Frequently Asked Questions
Can I make no-bake protein balls ahead of time?
Yes. These protein balls are ideal for preparing ahead. Make a batch, refrigerate it in an airtight container, and take out portions as needed throughout the week.
How should I store leftover protein balls?
Store them in an airtight container in the refrigerator for up to one week for best quality. If you want to keep them longer, freeze them in a suitable container for approximately 2–3 months.
Why is my protein ball mixture too sticky?
The peanut butter may be runny, or the mixture may need more dry ingredients. Add oats or protein powder one tablespoon at a time until the mixture is easier to handle. Chilling it briefly can also help.
Why are my protein balls too dry?
Protein powder and oats absorb moisture differently. Add a small amount of peanut butter or honey and mix again until the ingredients hold together when pressed.
Can I make these protein balls without protein powder?
Yes, but the recipe’s protein content will be lower and the texture may change. You may need additional oats or another suitable dry ingredient to help the mixture hold its shape.
Can I use quick oats instead of rolled oats?
Yes. Quick oats work as a substitute and may give the balls a softer texture. The mixture may absorb moisture differently, so adjust it gradually if needed.
Are these protein balls suitable for a gluten-free diet?
They can be made gluten-free by using certified gluten-free oats and verifying that the protein powder and chocolate chips are suitable for your dietary requirements.
Can I make these protein balls vegan?
Yes. Replace honey with maple syrup or another suitable plant-based sweetener, and use plant-based protein powder and dairy-free chocolate chips.
Final Thoughts
These Easy No Bake Protein Balls are a convenient homemade snack made with peanut butter, oats, honey, protein powder, and chocolate chips. They require no oven, take only 15 minutes of hands-on preparation, and can be stored in the refrigerator or freezer for later. Keep a batch ready for busy days, adjust the add-ins to your taste, and portion the mixture evenly for more consistent results.